UDMG Admin UI Installation
This guide explains how to install the Universal Data Mover Gateway Administrative User Interface (UDMG Admin UI) 3.1 on RHEL-based systems using the provided .zip package.
Prerequisites
- Root access.
- A supported web server (NGINX). NGINX is not provided with the UDMG installation packages. It must be installed before the other UDMG components. Please refer to Installing NGINX Open Source.
- A TLS certificate and its key for the configuration of HTTPS. A secure connection between the browser and the UDMG Admin UI is highly recommended.
A secure connection can also be enabled with a TLS offloading load balancer or proxy in your architecture. In that case, NGINX can be setup with as plain HTTP server.
Installation
The UDMG Admin UI is distributed as a .zip file. Installing it will deploy the application files to /opt/udmg/share/dist.
Follow the steps below to obtain, verify, and install the package.
In Steps 2 and 3, replace {VERSION} with the version of UDMG you are installing (e.g., 3.1).
1. Get the .zip package
To obtain the installation package, contact your Stonebranch representative. If you do not have a representative, reach out to support@stonebranch.com.
2. Verify the checksum
sha256sum -c udmg-server_{VERSION}_checksums.txt
3. Install the package
sudo unzip -d /opt/udmg/share udmg-ui_{VERSION}.zip
The zip file can now be deleted. If SELinux is enabled on the host, proceed with the steps in the section below: Using UDMG with SELinux.
Configuration
Once the package is installed, the next step is to configure the UDMG Admin UI.
Follow the steps below to set up NGINX and make the interface accessible through your web browser.
1. Set the NGINX configuration file
Create a configuration file to setup a new server for NGINX /etc/nginx/conf.d/udmg.conf file by opening it in a text editor. For example:
vi /etc/nginx/conf.d/udmg.conf
2. Edit the NGINX configuration file
Copy the following content in the /etc/nginx/conf.d/udmg.conf file:
upstream udmg_api {
    server localhost:8080;
    keepalive 32;
}

# Map to determine cache control headers
map $uri $cache_control {
    ~*\.(jpg|jpeg|png|gif|webp|svg)$ "public, max-age=31536000, immutable";
    default "no-store, no-cache, must-revalidate, proxy-revalidate, max-age=0";
}

map $uri $pragma_header {
    ~*\.(jpg|jpeg|png|gif|webp|svg)$ "";
    default "no-cache";
}

map $uri $expires_header {
    ~*\.(jpg|jpeg|png|gif|webp|svg)$ "1y";
    default "0";
}

server {
    listen 443 ssl;
    server_name _;

    ssl_certificate     /opt/udmg/etc/nginx/certs/cert.pem;
    ssl_certificate_key /opt/udmg/etc/nginx/certs/key.pem;
    ssl_session_timeout 5m;
    ssl_ciphers ECDHE-RSA-AES128-GCM-SHA256:ECDHE:ECDH:AES:HIGH:!NULL:!aNULL:!MD5:!ADH:!RC4;
    ssl_protocols TLSv1.3 TLSv1.2;
    ssl_prefer_server_ciphers on;

    # Compression settings
    gzip on;
    gzip_vary on;
    gzip_min_length 1024;
    gzip_proxied any;
    gzip_comp_level 6;
    gzip_types
        text/plain
        text/css
        text/xml
        text/javascript
        application/json
        application/javascript
        application/xml+rss
        application/atom+xml
        image/svg+xml;

    # Logging
    access_log /var/log/nginx/udmg_access.log;
    error_log /var/log/nginx/udmg_error.log;

    # Global cache headers using map
    add_header Cache-Control $cache_control always;
    add_header Pragma $pragma_header always;
    expires $expires_header;

    # Common proxy headers
    proxy_set_header Host $host;
    proxy_set_header X-Real-IP $remote_addr;
    proxy_set_header X-Forwarded-For $proxy_add_x_forwarded_for;
    proxy_set_header X-Forwarded-Proto $scheme;
    proxy_http_version 1.1;
    proxy_set_header Connection "";

    # Redirect /udmg to /udmg/
    location = /udmg {
        return 301 /udmg/;
    }

    # Handle /api/v1/auth* - rewrite path and proxy
    location ~ ^/api/v1/auth {
        rewrite ^/api/v1/auth(.*)$ /auth/login$1 break;
        proxy_pass http://udmg_api;
    }

    # Handle /api/v1/spec - proxy for swagger
    location ~ ^/api/v1/spec {
        proxy_pass http://udmg_api;
    }

    # Handle /api/v1* - remove prefix and proxy
    location ~ ^/api/v1 {
        proxy_pass http://udmg_api;
    }

    # Handle /auth* - proxy
    location ~ ^/auth {
        proxy_pass http://udmg_api;
    }

    # Handle /udmg/* - serve static files with SPA fallback
    location /udmg/ {
        alias /opt/udmg/share/dist/app/;
        try_files $uri $uri/ /udmg/index.html;

        # Override cache headers for this location
        add_header Cache-Control "no-store, no-cache, must-revalidate, proxy-revalidate, max-age=0";
        add_header Pragma "no-cache";
        add_header Expires "0";
    }

    # Specific cache headers for images within /udmg/
    location ~ ^/udmg/.*\.(jpg|jpeg|png|gif|webp|svg)$ {
        alias /opt/udmg/share/dist/app/;
        add_header Cache-Control "public, max-age=31536000, immutable";
        expires 1y;
    }

    # Handle /swagger* - proxy
    location ~ ^/swagger {
        proxy_pass http://udmg_api;
    }
    # Handle /spec* - proxy
    location ~ ^/spec {
        proxy_pass http://udmg_api;
    }
}
The following parameters are especially important.
In the server block:
| Directive | Description |
|---|---|
listen | The port for the web application. |
ssl_certificate | The path to a TLS certificate in PEM format. |
ssl_certificate_key | The path to the TLS certificate key in PEM format. |
access_log | The path and format for the NGINX access log file. |
error_log | The path for the NGINX error log file. |
server {
    listen 443 ssl;
    server_name _;

    ssl_certificate     /opt/udmg/etc/nginx/certs/cert.pem;
    ssl_certificate_key /opt/udmg/etc/nginx/certs/key.pem;
    ...
    # Logging
    access_log /var/log/nginx/udmg_access.log;
    error_log /var/log/nginx/udmg_error.log;
}
In the upstream block:
| Directive | Description |
|---|---|
server | The hostname and port for the UDMG Server API. |
upstream udmg_api {
    server localhost:8080;
    keepalive 32;
}
3. Disable NGINX test site
NGINX default configuration provides a HTTP Server Test Page on port 80. Disable it by removing one of the following files (this depends on the NGINX version and OS flavor):
/etc/nginx/conf.d/default.conf/etc/nginx/sites-enabled/default
Service Start
After completing the configuration, start the UDMG service by following these steps:
1. Verify that the configuration is correct
Command:
sudo nginx -t
Expected output:
nginx: the configuration file /etc/nginx/nginx.conf syntax is ok
nginx: configuration file /etc/nginx/nginx.conf test is successful
2. Enable and start the NGINX service
sudo systemctl enable nginx
sudo systemctl start nginx
3. Test the web server port
Command:
curl -s https://localhost/udmg/ |grep title
Expected output:
<title>Stonebranch Universal Data Mover Gateway</title>
4. Open the UDMG Admin UI on your browser
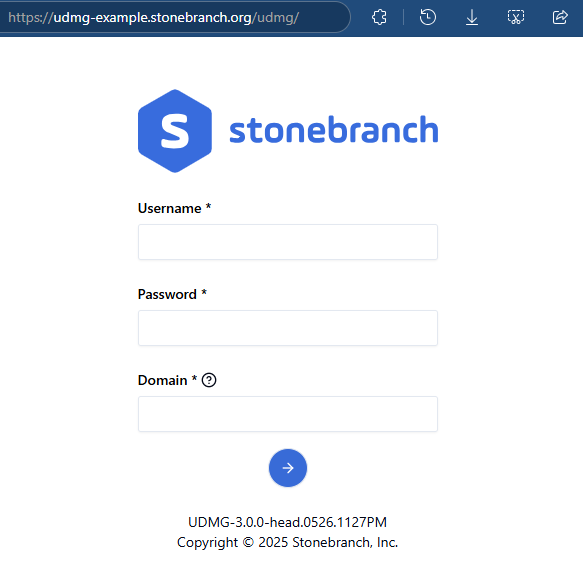
For detailed guidance on navigating and using the Admin UI, see the User Interface section.
Using UDMG with SELinux
Security-Enhanced Linux (SELinux) is enabled by default on modern RHEL and CentOS servers. Each operating system object (process, file descriptor, file, etc.) is labeled with an SELinux context that defines the permissions and operations the object can perform. In RHEL 6.6/CentOS 6.6 and later, NGINX is labeled with the httpd_t context.
When SELinux is enabled, the UDMG Admin UI might fail to load correctly.
On the landing page, you may encounter errors such as:
- 403 Access Denied
- 404 Page Not Found
- 502 Bad Gateway
In addition, the NGINX log may include permission-related messages similar to:
... *1 "/opt/udmg/share/dist/app/index.html" is forbidden (13: Permission denied), ...
... *36 connect to localhost:8080 failed (13: Permission denied) while connecting to upstream...
To resolve these issues, follow these steps:
1. Verify whether SELinux is enforced with the getenforce command
A result of "Enforcing" means that is is enabled and that the steps below are required.
Command:
getenforce
2. Modify the file labels
Allow NGINX to access the configuration files.
Command:
sudo restorecon /etc/nginx/conf.d/*
Allow NGINX to access the UDMG Admin UI asset files.
Command:
sudo semanage fcontext -a -t httpd_sys_content_t '/opt/udmg/share/dist(/.*)?'
sudo restorecon -Rv /opt/udmg/share/dist
The file context usr_t can also be set (or restored) for the asset files, instead of httpd_sys_content_t.
3. Allow NGINX to reverse proxy
Allow NGINX to reverse proxy through the UDMG Server API by setting the httpd_can_network_connect boolean.
Command:
sudo setsebool -P httpd_can_network_connect 1
For additional details and best practices, see Using NGINX and NGINX Plus with SELinux.