Create Entra App for Universal Portal
Next, we will set up an Entra application for Universal Portal. This is very similar to what we did for Universal Controller previously.
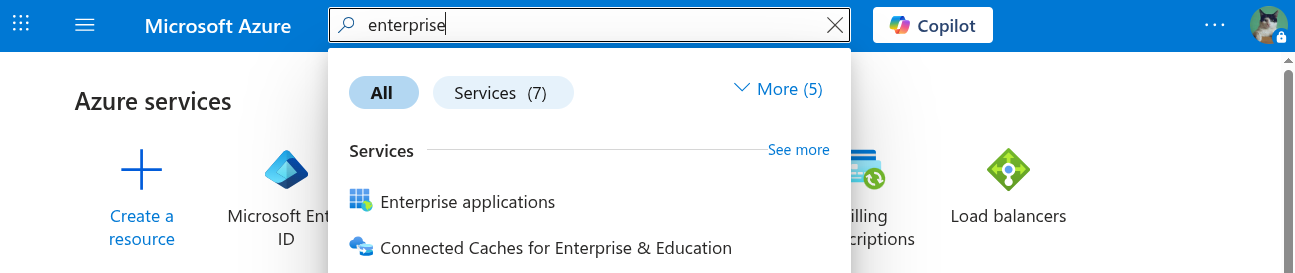
Step 1 | Log into the Microsoft Azure Portal using your admin credentials. |
|---|---|
Step 2 | Go to Azure > Enterprise Applications.
|
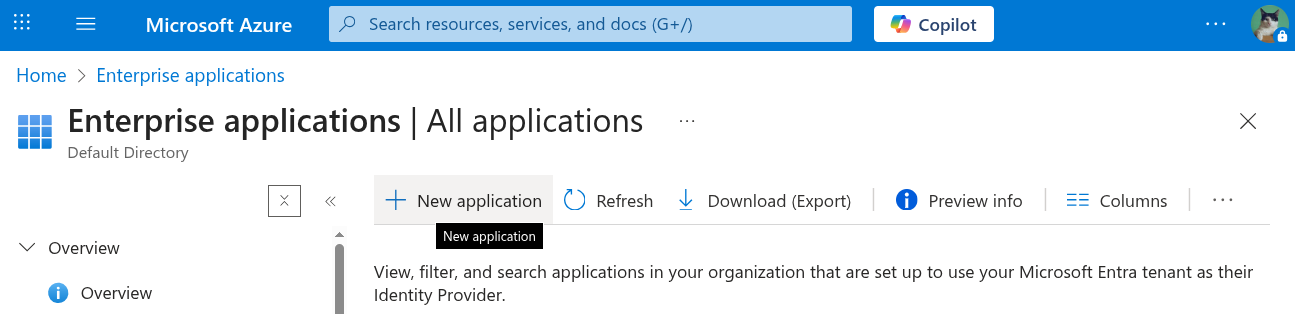
Step 3 | Go to Enterprise Applications From Enterprise applications, click New application.
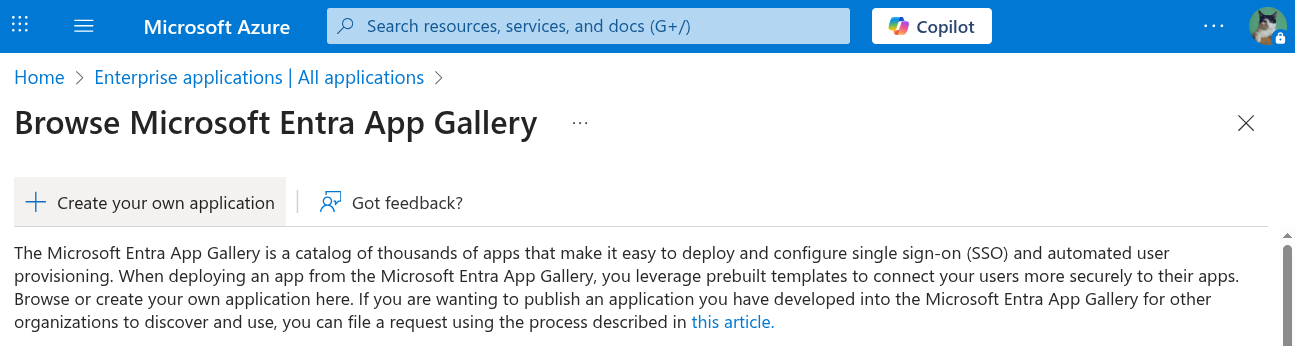
Then click Create your own application.
|
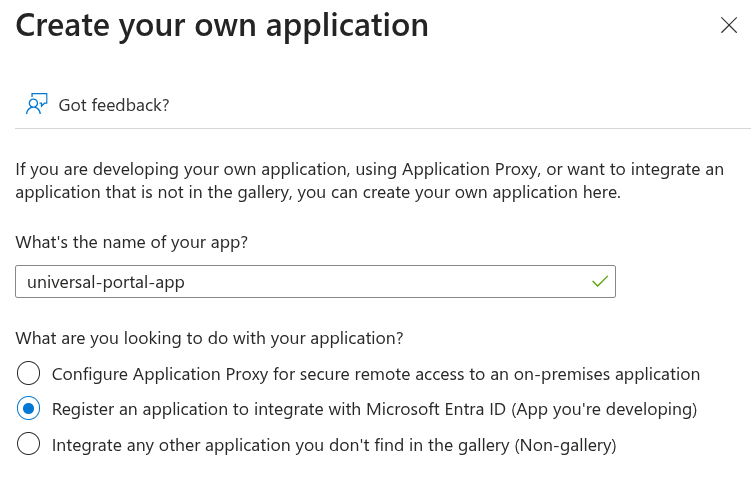
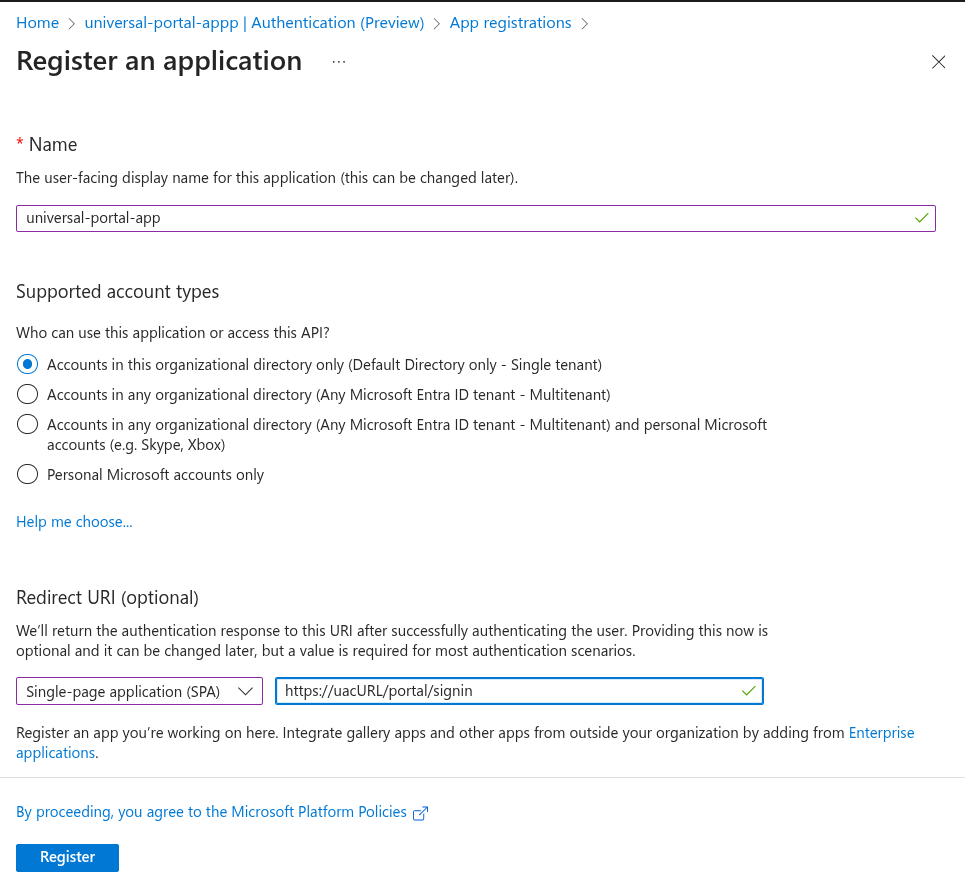
Step 4 | This application represents the Universal Portal. Select the Register an application to integrate with Microsoft Entra ID (App you're developing) option**.** Then, click Create.
|
Step 5 | Select Single tenant for those who can access the application Under Redirect URI
Click Register.
|
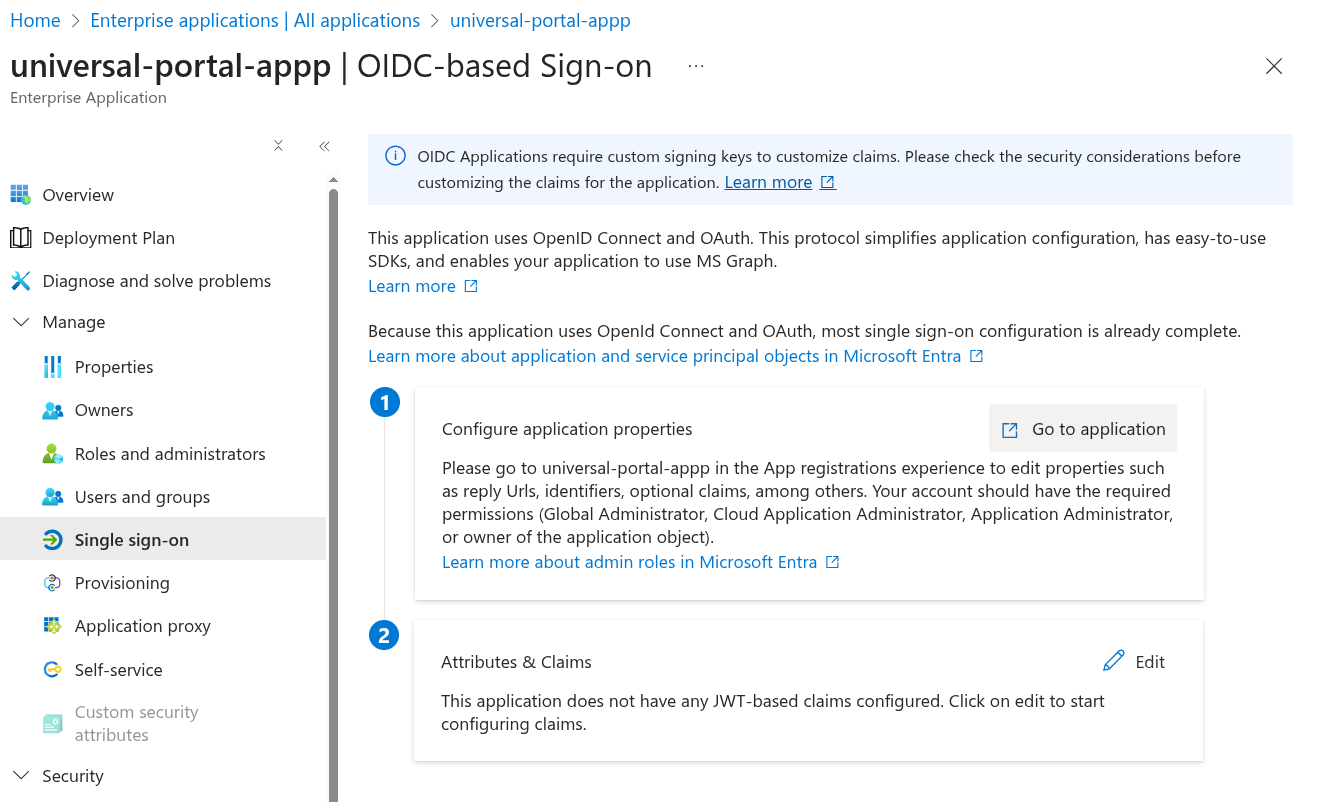
Step 6 | Go to Enterprise Applications > All Applications Click Refresh and select the universal-portal-app from the list.
Click Single sign-on from the left navigation, and then click Go to Application.
|
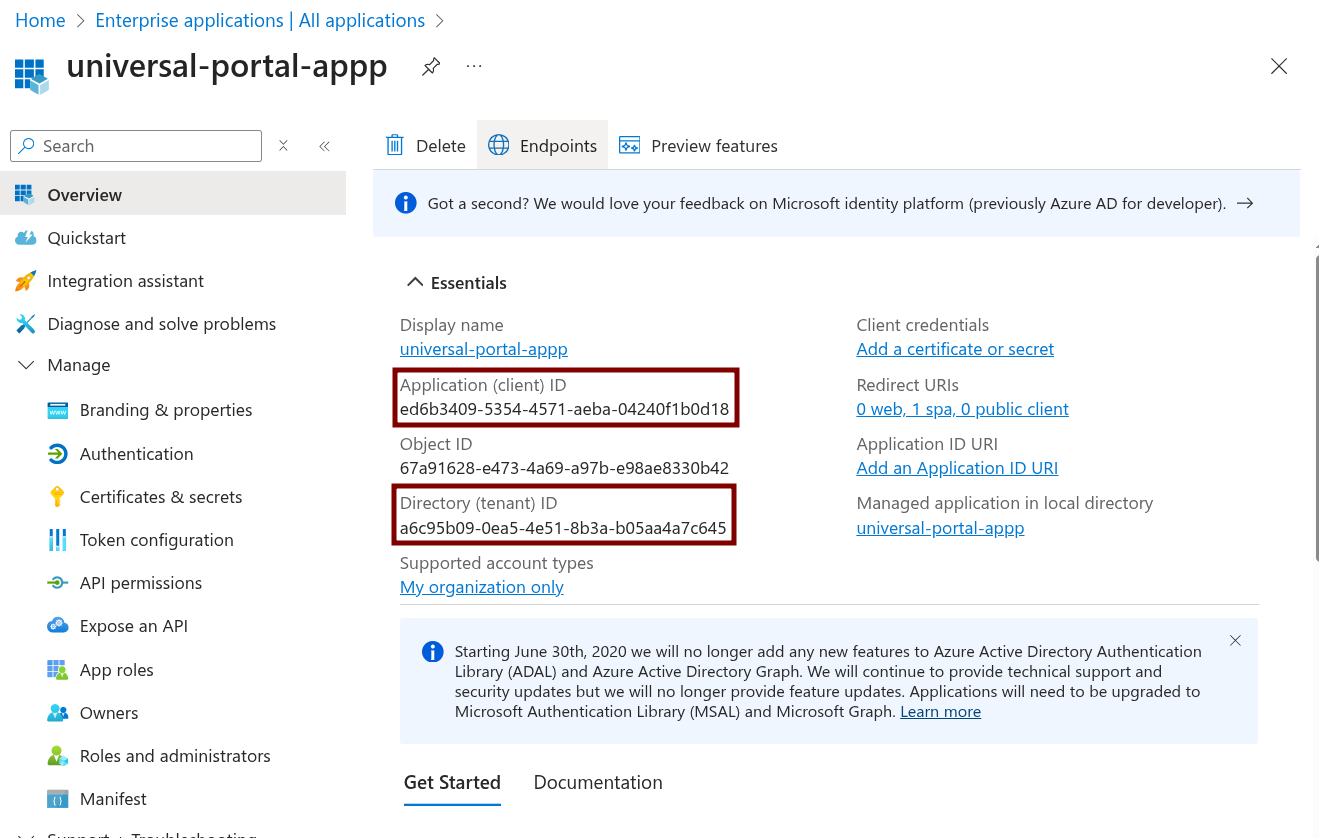
Step 7 | From the Overview, take note of both the Application (client) ID and Directory (tenant) ID, as we will need this information later.
|
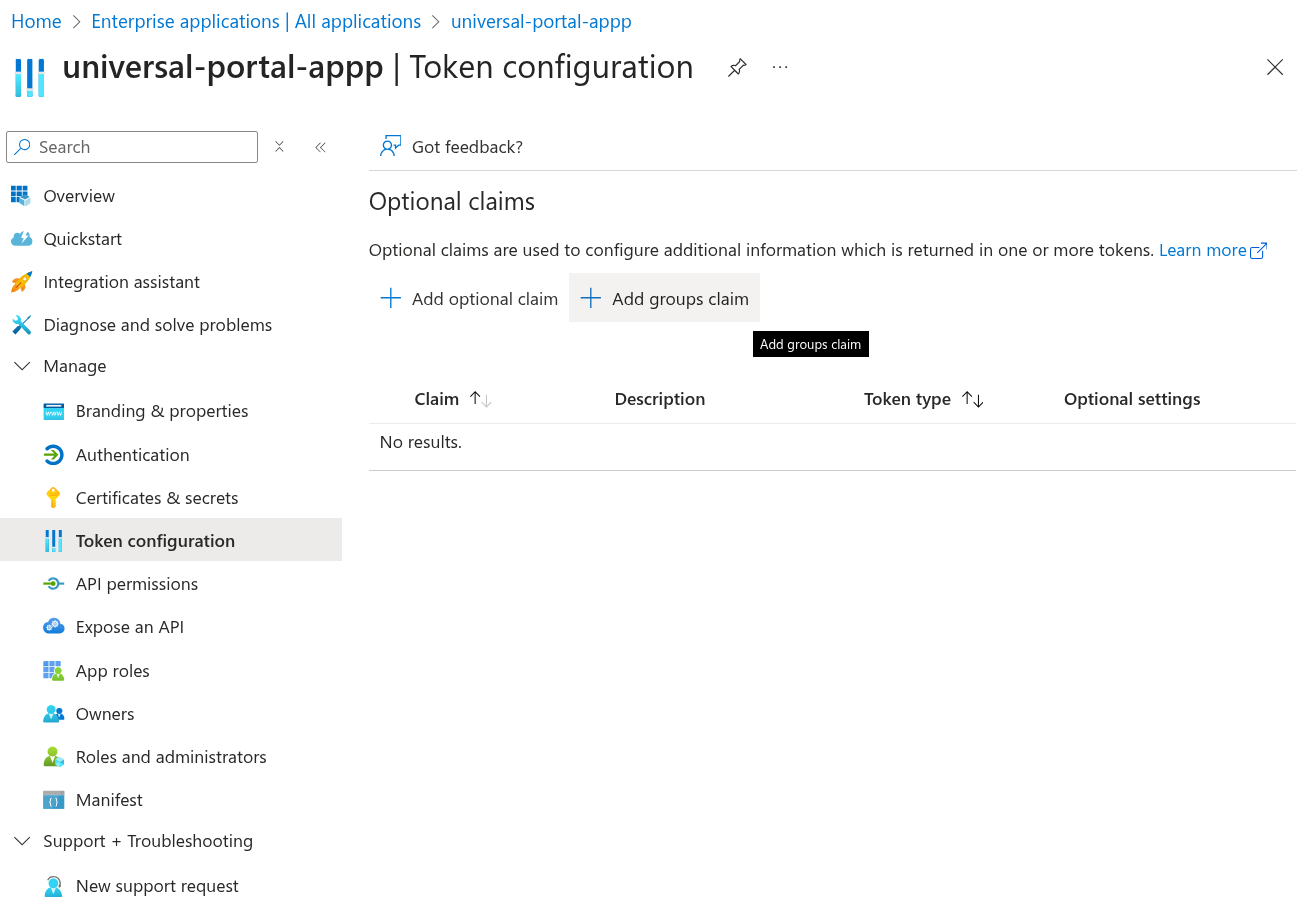
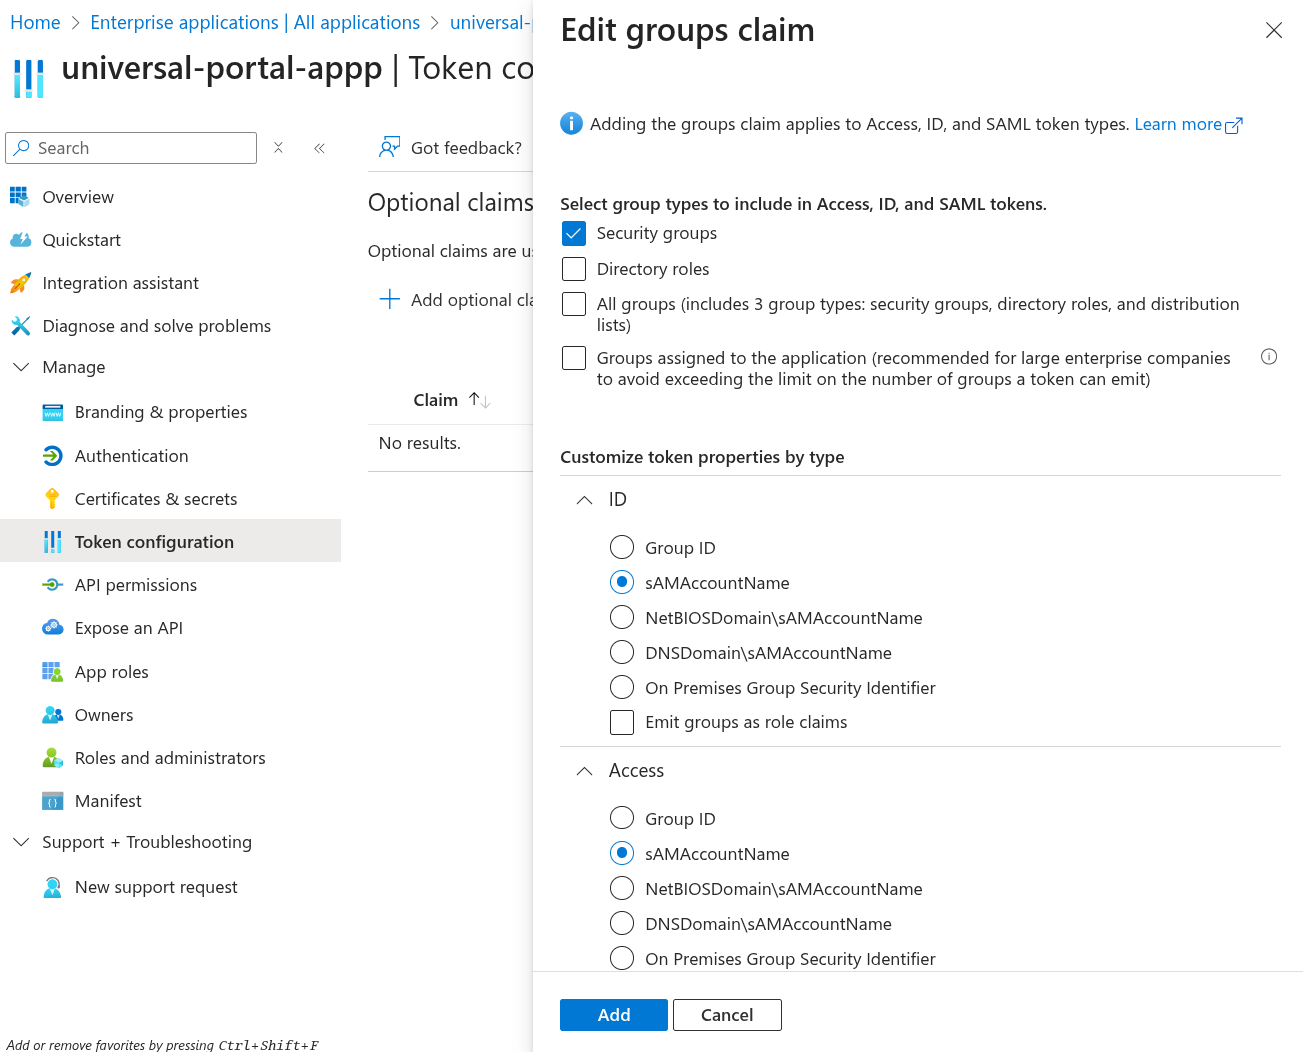
Step 9 | Go to Token configuration. Click Add groups claim.
In the opened dialog, select Security Groups, and assign sAMAccountName to the ID and Access token properties. Click Add.
|
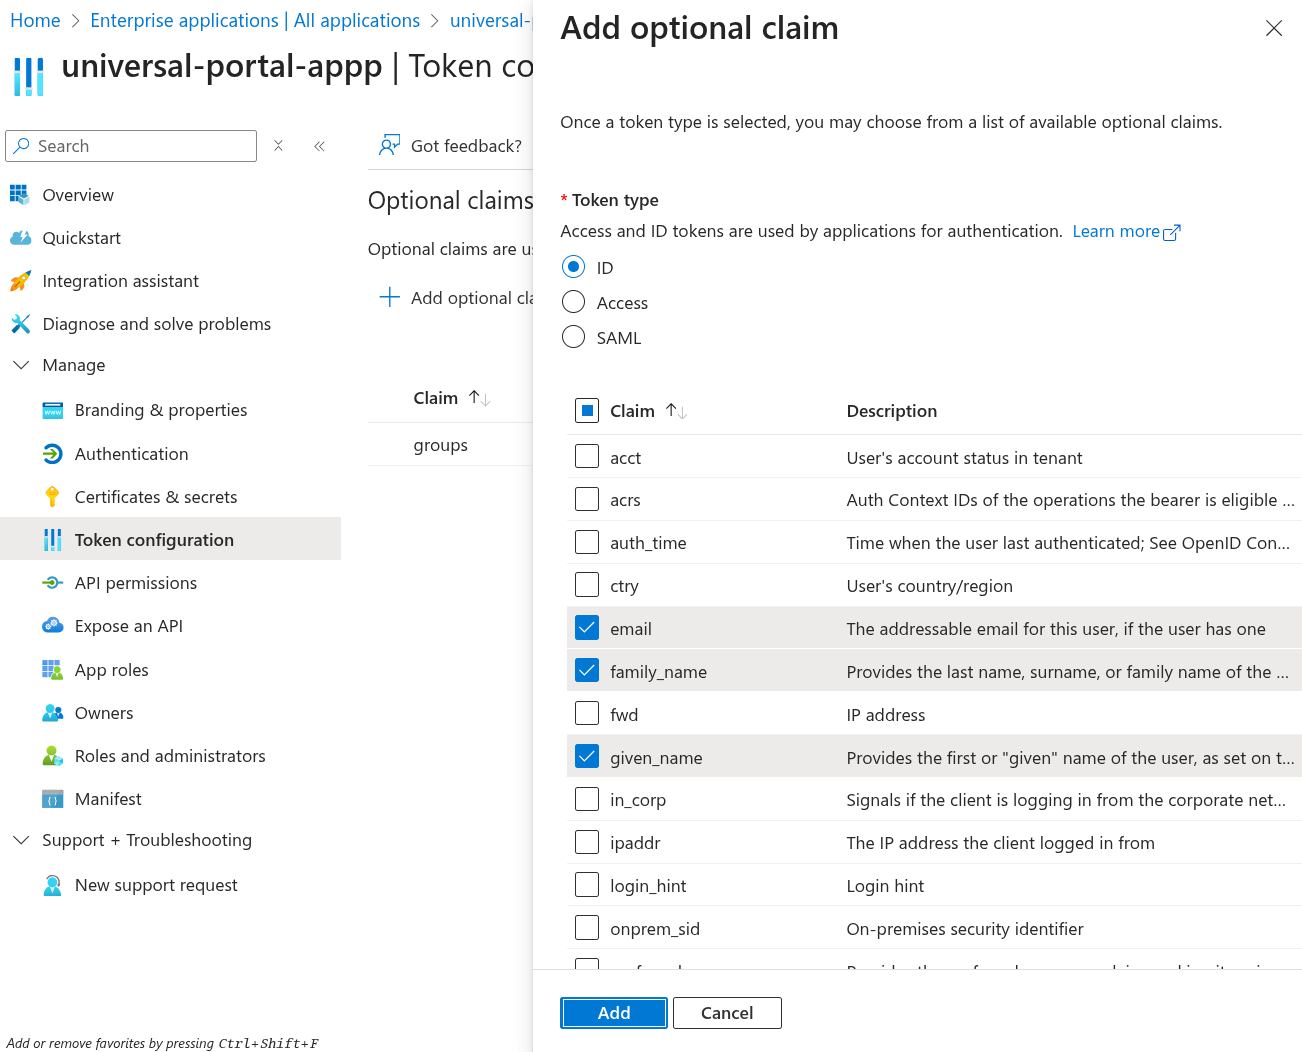
Step 10 | Go to Token configuration. Click Add optional claim. Select ID from the options, and choose email, family_name, given_name, preferred_username. Click Add.
Check Turn on the Microsoft Graph email, profile permission (required for claims to appear in token). Click Add.
|
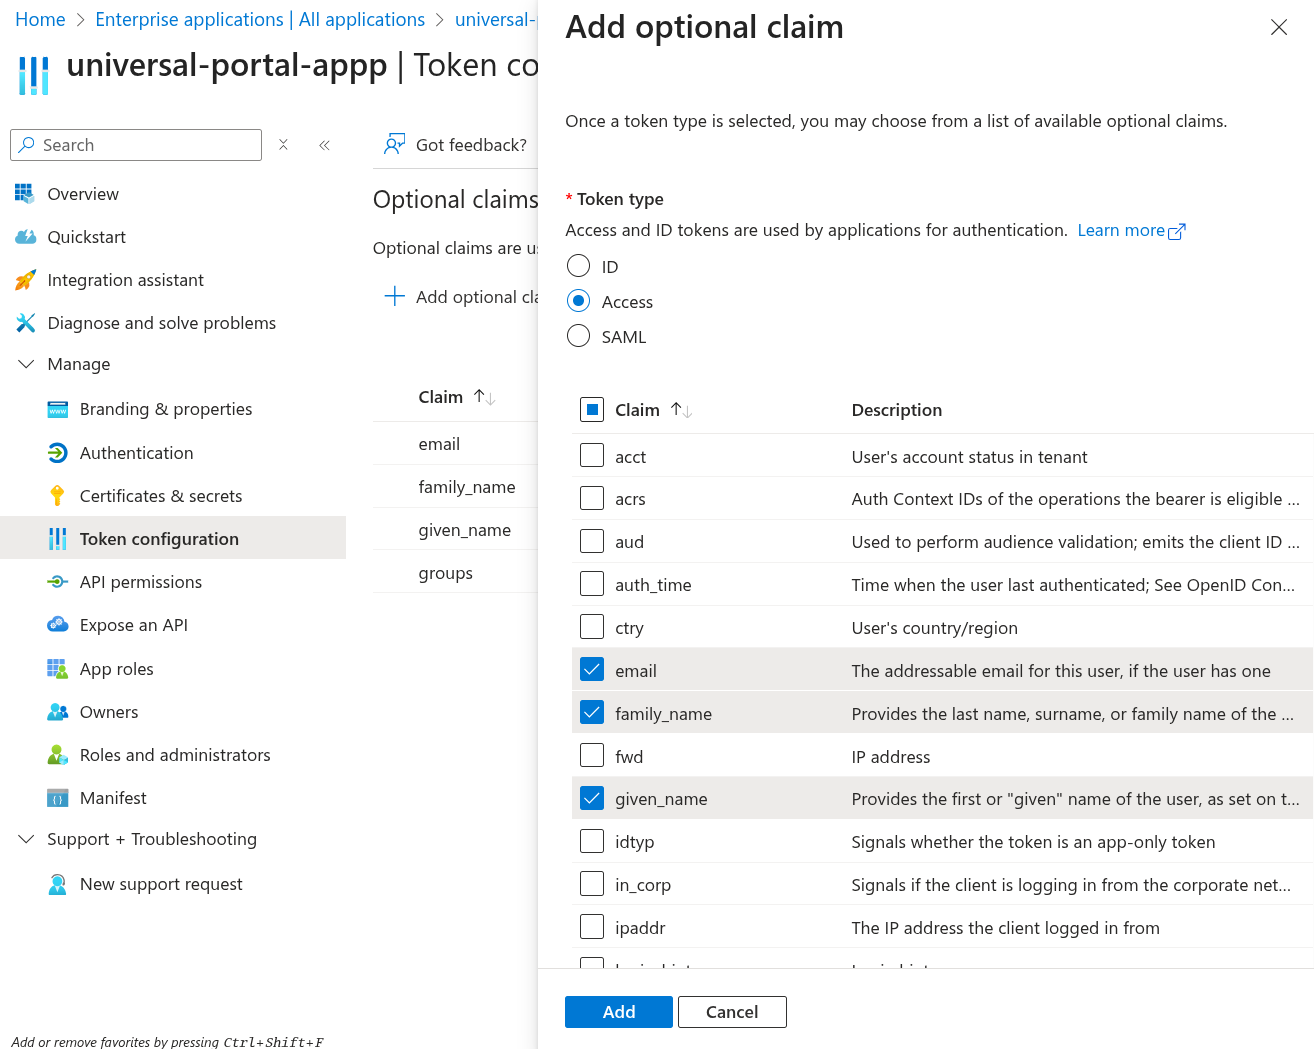
Step 11 | Go to Token configuration. Click Add optional claim again. This time, select Access from the options, and choose email, family_name, given_name, preferred_username. Click Add.
|
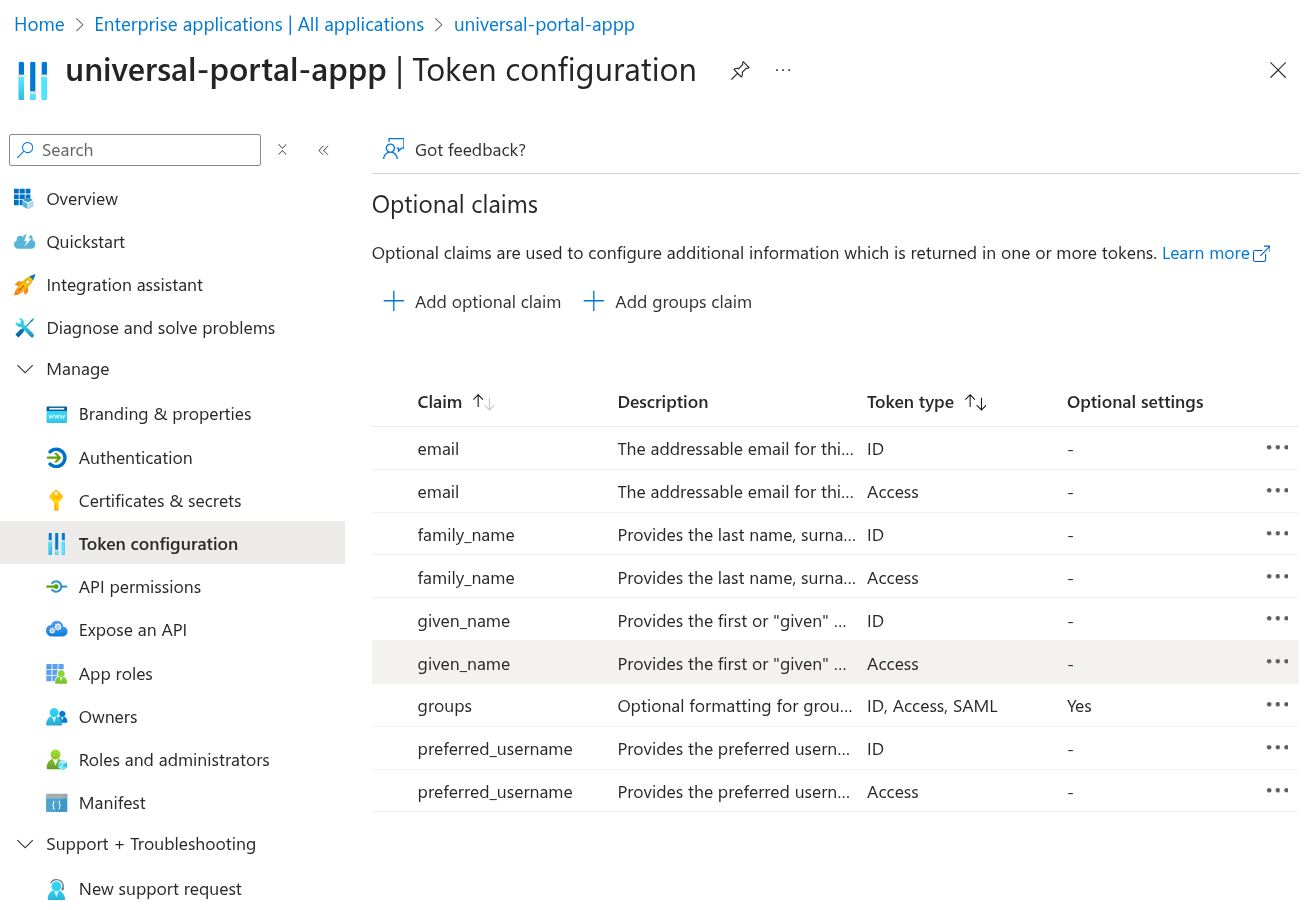
Step 12 | Go to Token configuration Once you are all done, confirm you have all the claims in place.
|
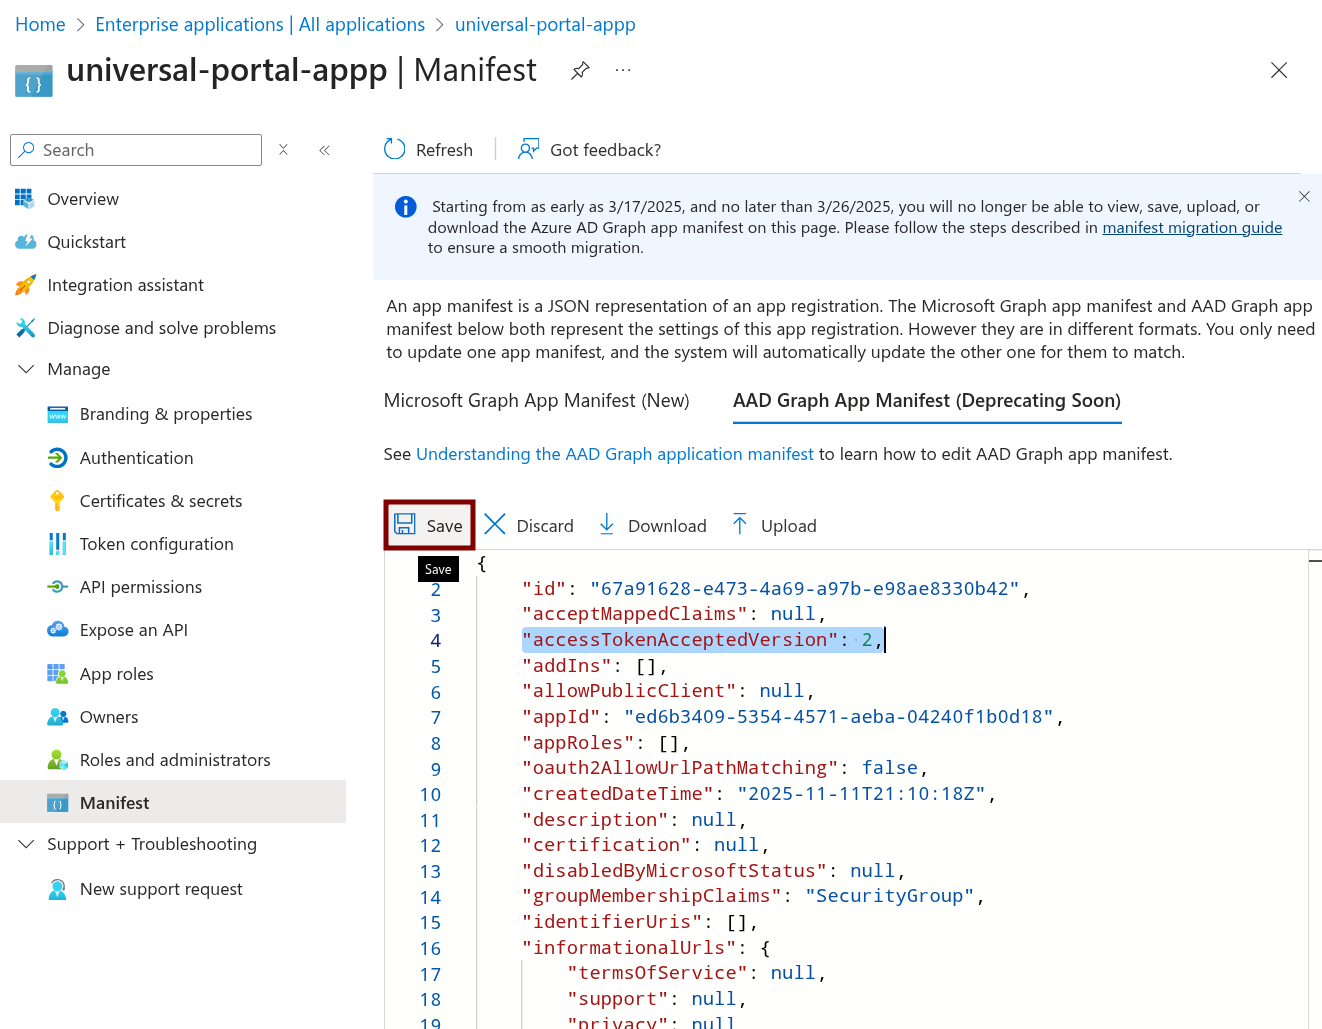
Step 13 | Go to Manifest. Select AAD Graph APP Manifest. Find this line: Update the value to 2: Click Save.
|
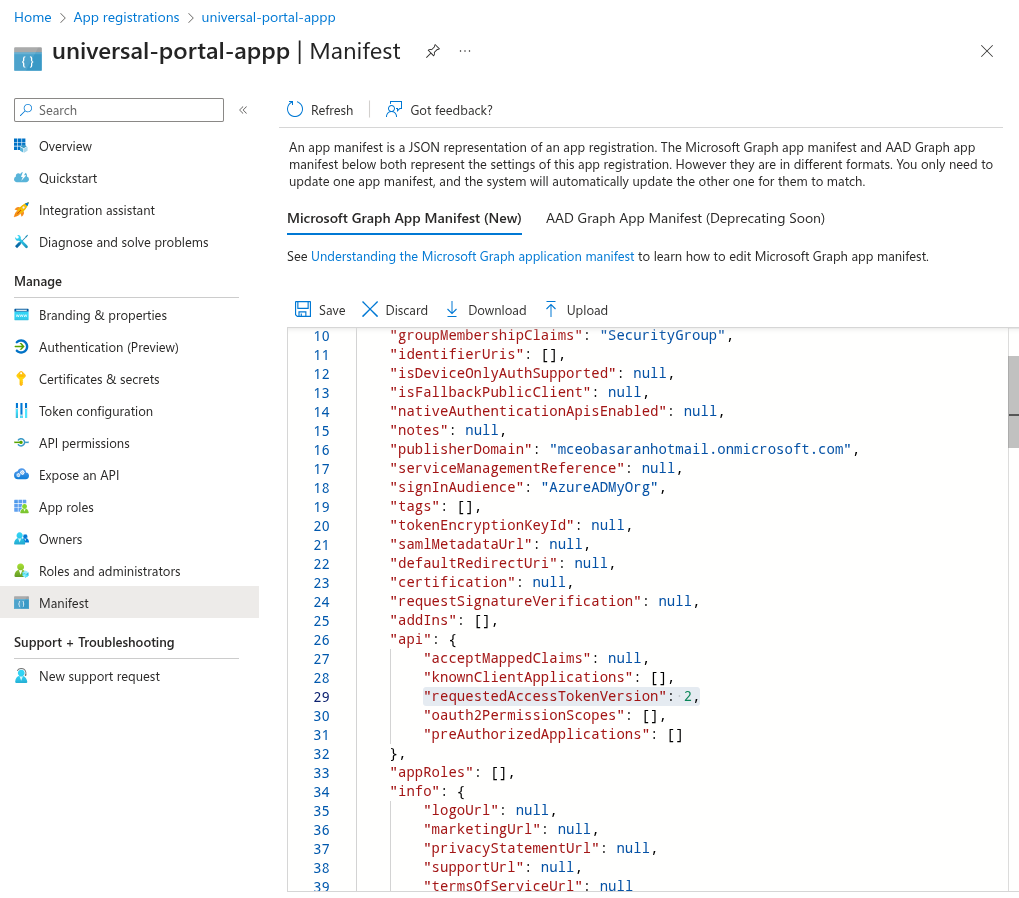
Step 14 | Go to Manifest. Select Microoft Graph App Manifest (New). Find this line: Update the value to 2: Click Save.
|
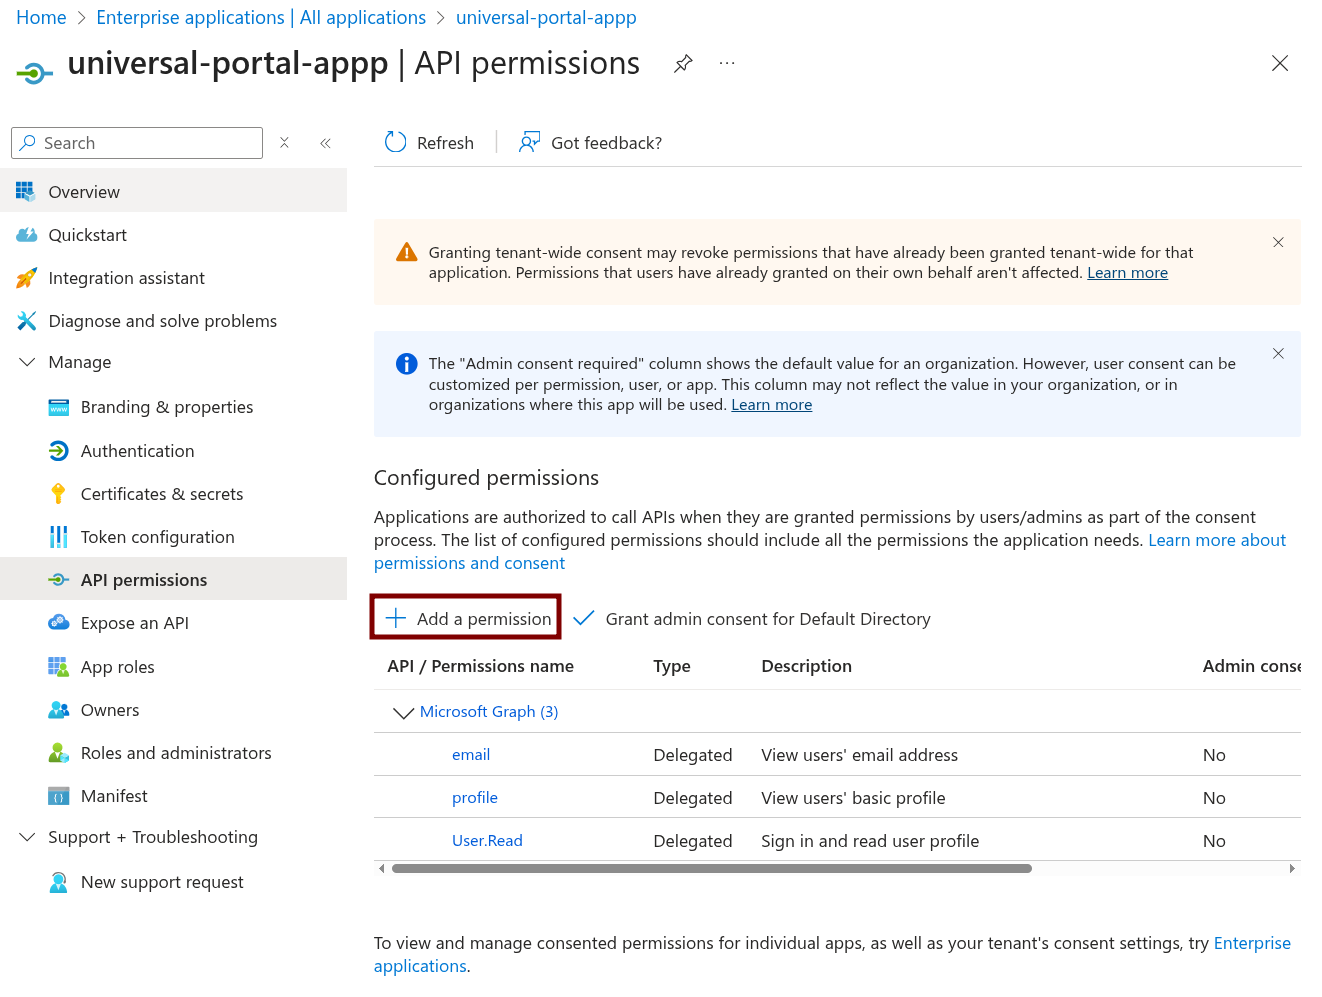
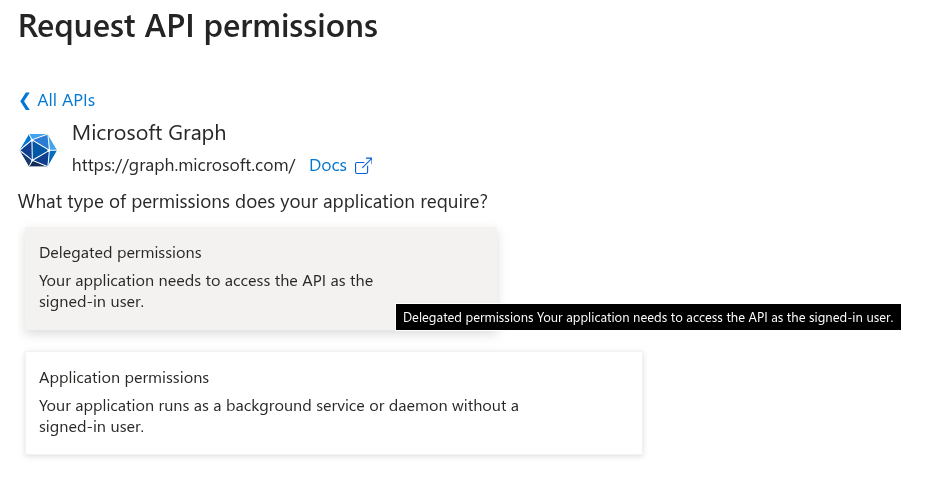
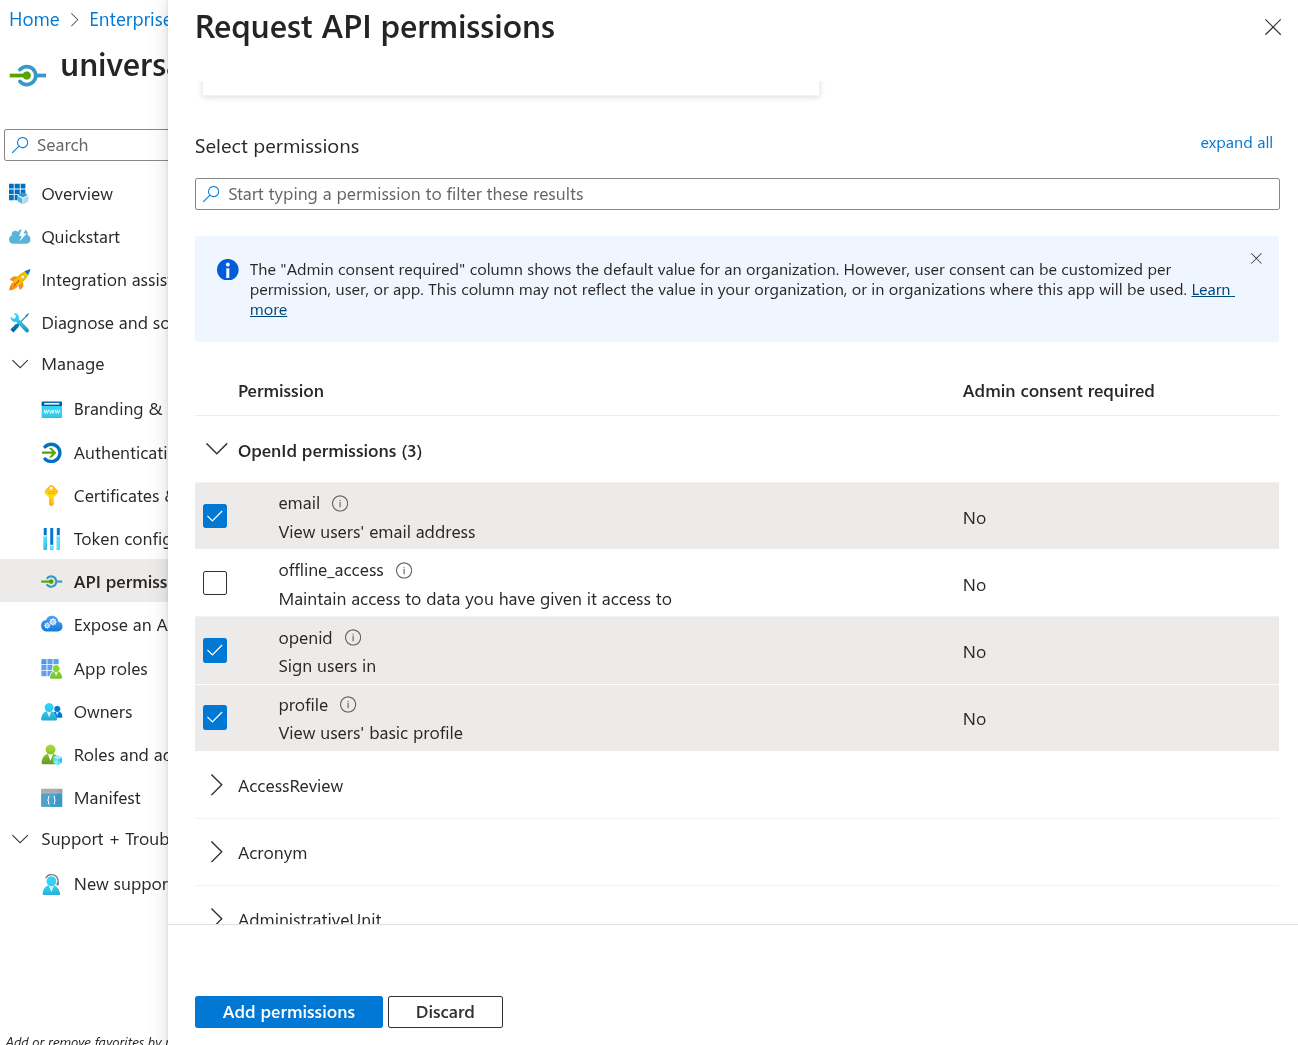
Step 15 | Go to API Permissions. Click Add a Permission.
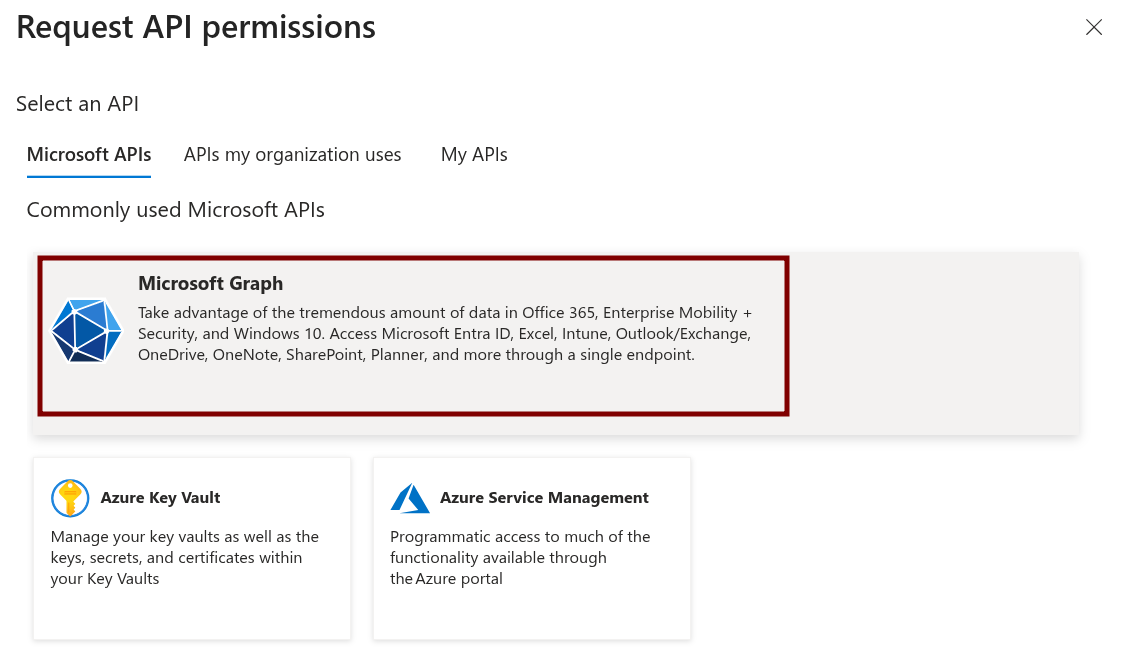
Select Microsoft Graph.
Select Delegated permissions.
Scroll down and make sure email, openid, and profile are checked. Click Add permissions.
|
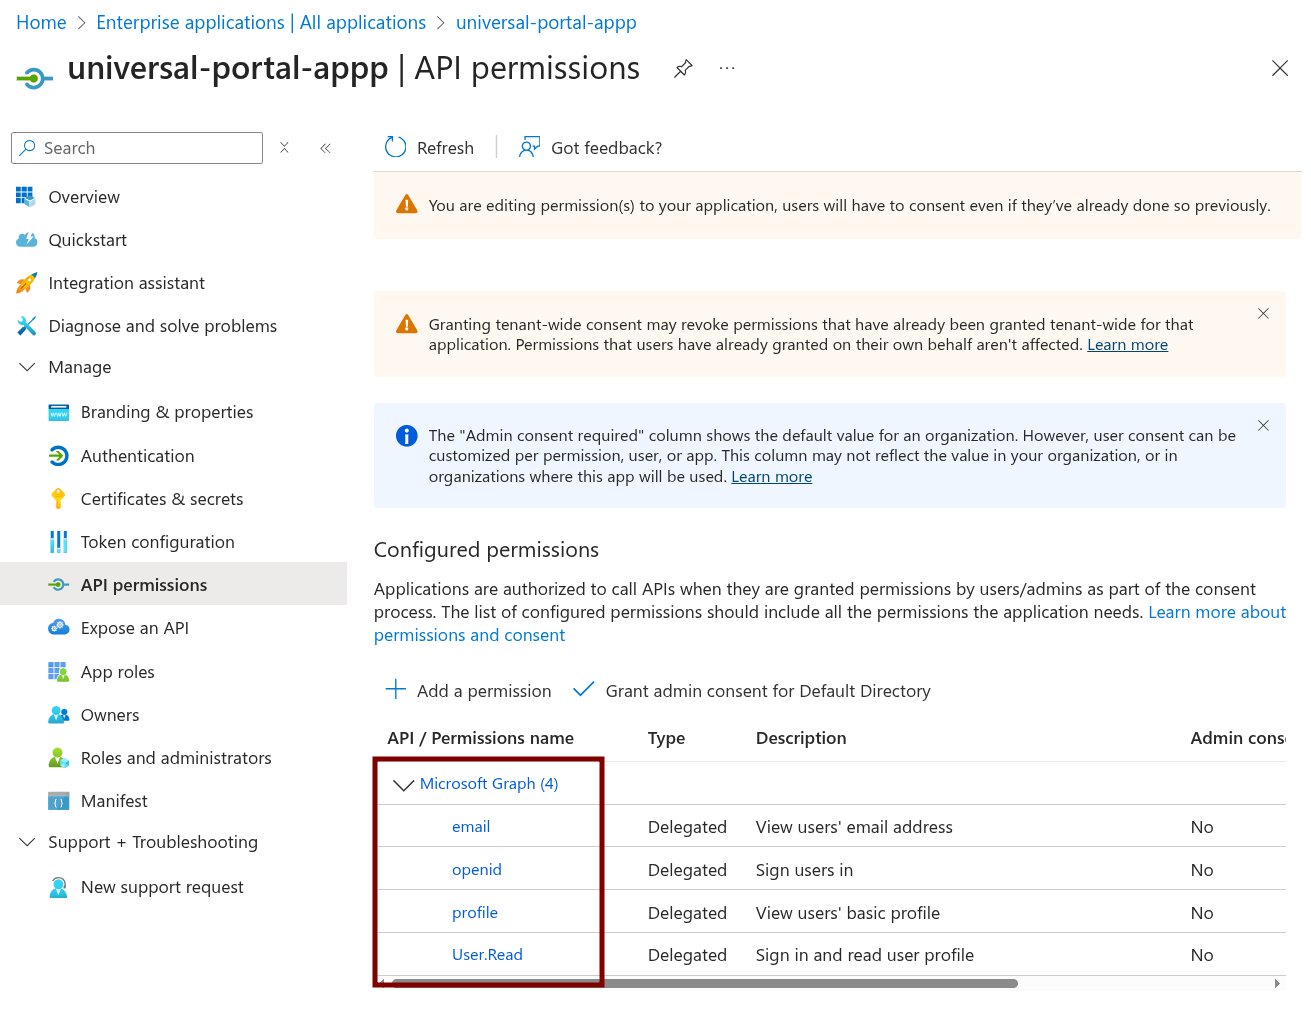
Step 16 | Confirm you have the right API permissions.
|