Installing UEC via the Graphical Interface
Installing Universal Enterprise Controller via the Windows Installer Graphical Interface
To install Universal Enterprise Controller using the Windows Installer graphical interface, perform the following steps:
Step 1 | Download the Universal Enterprise Controller for Windows product distribution file, sb-UECtlr-6.3.0.<level>-windows-i386.exe, to your work station. |
|---|---|
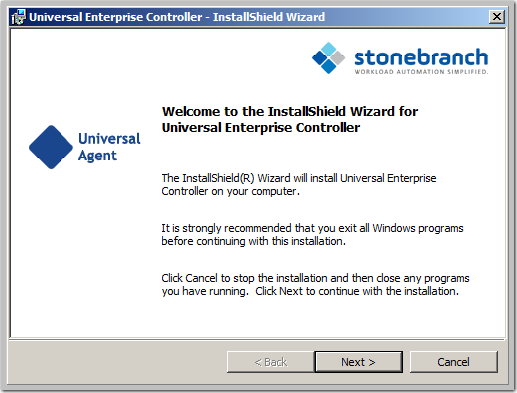
Step 2 | Execute the distribution file to extract the files. info If you already have extracted the files from the distribution file, but cancelled installation in order to separately install Windows Installer, you can simply double-click the extracted Universal Enterprise Controller installation file, UECtlr.msi, to begin the installation. tip Starting with Windows Server 2003, Remote Desktop provides distinct session environments for each logged-in user. This means that extraction may use an environment setting that is not available once the Remote Desktop session ends. For example, the distribution file's default extraction location is based on the TEMP environment variable. The location referenced by this variable can change between Remote Desktop sessions, and any files extracted there may not be accessible after the session is closed. To ensure that extracted files and other required resources are accessible after the initial install, extract the files to a well-known location that is not likely to change between Remote Desktop sessions. Refer to the Microsoft documentation on the Remote Desktop feature for additional information. The installation starts after the files are extracted. It first will verify that your machine meets the minimum system requirements (see Universal Enterprise Controller for Windows - Installation Requirements). If the requirements are met, a Welcome dialog displays.
|
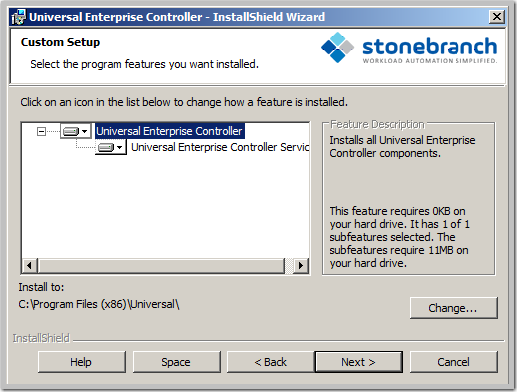
Step 3 | Click the Next button. A list of Universal Enterprise Controller components included in the installation package then displays. It is from this list that you can select which components to install.
For a new installation, a drive icon displays next to each item in the list, indicating that the component will be installed. For an upgrade installation, either of the following icons displays next to an item:
tip If the installation detects an existing Universal Enterprise Controller installation, currently installed components may be upgraded. |
Step 4 | The previous figure shows that all Universal Enterprise Controller components will be installed in their respective directories under the
|
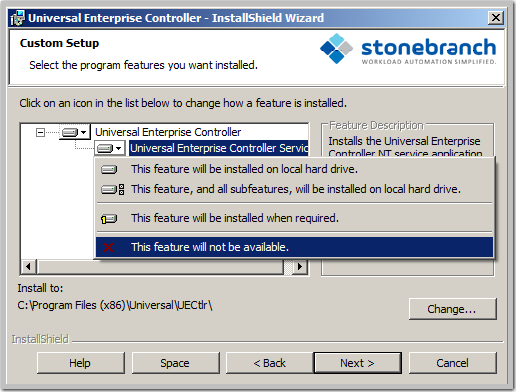
Step 5 | If you do not want to install a component:
For example, the following figure indicates that the Universal Enterprise Controller Service has been selected to not be installed.
|
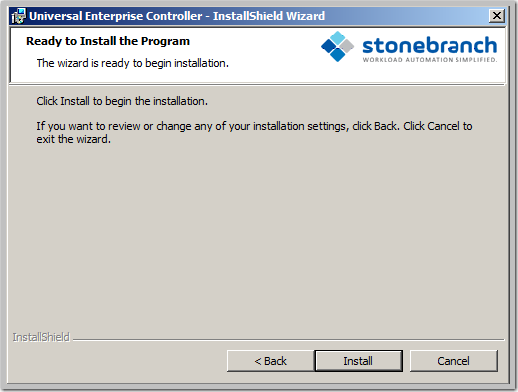
Step 6 | When you have selected the components (and their installation destinations) that you want to install, click the Next> button to continue the installation process. When the installation is ready to begin, the Ready to Install dialog displays.
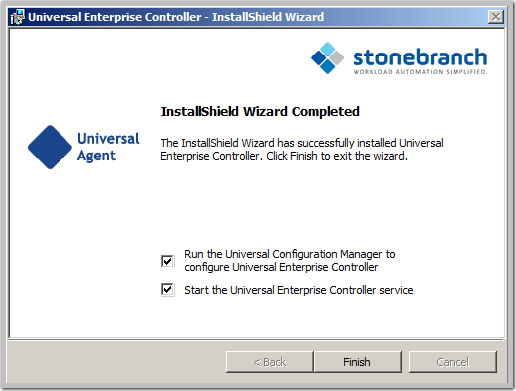
Click the Install button to begin the installation or click the <Back button to return to change information on any of the previous dialogs. When the installation completes successfully, the Installation Complete dialog displays.
|
Step 7 | If the Universal Enterprise Controller service was installed, the following options display on this dialog:
Select both of these options to configure and/or start the Universal Enterprise Controller service. |
Step 8 | Click the Finish button to exit Windows Installation. |